
Have you ever thought about building your own sound system that can go head-to-head with commercial speakers? This DIY Bluetooth speaker kit lets you flex your tech skills and create a real treat for your ears.
We begin by spreading out all the parts and double-checking that every tool and component is at hand. A clear circuit diagram and solid soldering techniques guide you along the way, ensuring that the project is both fun and dependable.
Step by step, you’ll turn simple components into a speaker with crisp, vibrant sound. It’s proof that with a little care and hands-on work, you can build a quality sound system from scratch.
diy bluetooth speaker kit: Bright Sound Build
Start by unpacking all your parts. Lay out the amplifier board, Bluetooth module, speaker, wires, and any extra tools so you know nothing is missing. Checking every item, like the connector cable and soldering iron, sets you up for a smooth build.
Next, study the circuit diagram. It clearly shows you should attach the battery's positive lead to the B+ pin on the amplifier board. Follow this guide exactly so your power connection is right from the start.
Now, begin soldering your key connections. Connect the wires to the AUX input and SD-card slot while following the step-by-step instructions. Use quality solder and make sure each joint is neat and secure. Once the wires are in place, mount the boards into the right slots of your compact speaker case. Confirm all connectors are properly aligned to ensure great performance when playing music.
Before moving on, run an initial power-on test. Power up the kit and check for the indicator lights on the Bluetooth amplifier. If the LED shows the correct charging signal and you hear a startup beep from the Bluetooth module, you know your work is on track.
Stick to these steps and you'll transform your DIY bluetooth speaker kit into a bright sound build.
Essential Component Selection and Sourcing for Your DIY Bluetooth Speaker Kit

Start by making a list of all the audio parts you need. This kit includes a 4Ω/3W speaker, a connector cable, a flexible amplifier board, and a Bluetooth module. Check that the amplifier board’s voltage and current match your power supply and look for clearly marked input ports for Bluetooth, AUX, and SD cards. Using quality wires and careful soldering will keep your sound crisp and clear.
Next, review the board’s datasheets and double-check that its pin layout matches the wiring diagram exactly. Follow the soldering tips closely so that each joint is secure and insulated well. Testing a single connection before you complete the whole build is a smart way to catch any mistakes early.
Don’t forget your woodworking supplies, either. You’ll need wood glue, 1¼-inch 18-gauge brad nails, and the right drill bits, like a 1¼-inch Forstner bit for tweeter cutouts and a 3/8-inch bit for pilot holes. Buying these materials from a reliable hardware store will lay a strong foundation for your DIY Bluetooth speaker kit.
Amplifier Circuit Tutorial and Speaker Wiring Diagram Explained
In the Bright Sound Build section of our DIY Bluetooth speaker kit, you'll learn how to solder the battery, AUX, and SD input connections. Here, we focus on the standout parts: a clear wiring table, the Micro-USB charging port, and a red LED that lights up when charging. The Bluetooth module still follows the same wiring guidelines as before, with a bit more focus on its different operating modes.
Below is a wiring blueprint that breaks down the main steps:
| Connection | Action |
|---|---|
| Battery Positive | Attach to the B+ pin; check the build section for soldering tips |
| Speaker Output | Connect securely to a 4Ω/3W speaker |
| AUX & SD Slot | Solder carefully, following the previous instructions |
| Micro-USB Port | Wire for charging and confirm the red LED indicates active charging |
Enclosure Building Techniques and Woodworking Casing Design
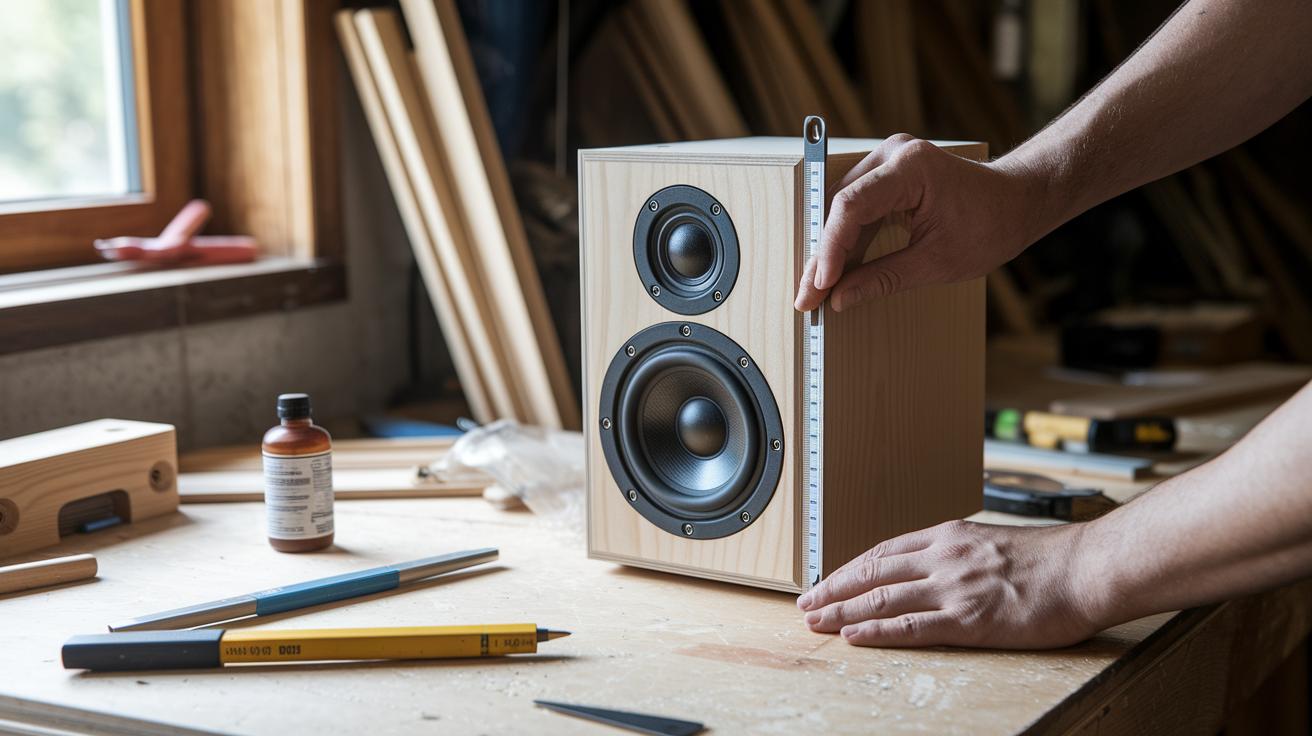
Start by measuring and cutting your wood pieces according to your plan. In our project, the cabinet is 18 inches long, 10 inches wide, and 10 inches deep, giving you about one cubic foot of space. Use quality tools to create neat, mitered corners that add a clean, modern look. Spread wood glue along the edges and clamp the pieces until the glue dries. Then secure the joints with 1.25-inch 18-gauge brad nails. Using both glue and nails boosts the strength and gives your speaker box a professional finish.
Next, mark the front panel by drawing diagonal lines that cross at the center. A speed square makes it easy to find the exact middle, ensuring your speaker cutouts line up perfectly. For the tweeters, drill smooth, circular holes with a 1.25-inch Forstner bit. Then, make a small 3/8-inch pilot hole to guide a jigsaw as you cut out the space for the woofer driver. These precise steps make sure that the audio parts fit right and perform their best.
Once your components are set, give the enclosure a light sanding. This helps maintain the natural look of reclaimed wood while smoothing out any rough spots. Finally, make sure the back panel fits flush by applying wood glue to the cabinet’s rabbet grooves and using brad nails for extra hold. These careful techniques result in a sturdy, attractive casing that works great in your DIY Bluetooth speaker kit.
Subwoofer Integration Guide for Enhanced Bass Performance
If you're looking to boost your DIY Bluetooth speaker kit for richer, deeper sound, start by choosing the right amplifier. For example, the Up2stream Plate Amp 2.1 gives you a 2.1 setup: 50W for each stereo channel plus an extra 100W channel dedicated to the subwoofer. This design ensures clear mid-range output while delivering punchy bass.
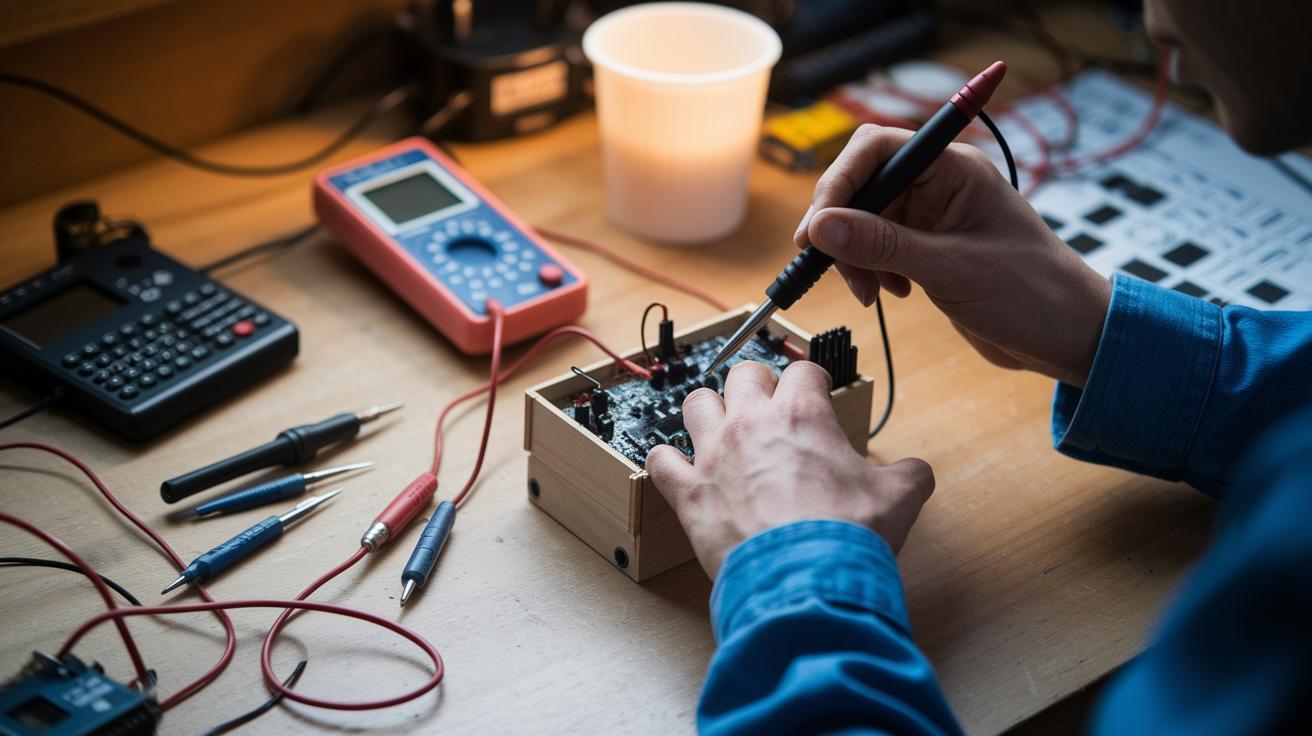
Next, plan out the wiring for your extra subwoofer driver. Solder wires from the amplifier's dedicated subwoofer output to your speaker cable and make sure each connection is solid and safe. A handy tip: use a multimeter to check for continuity after soldering each joint, so you know everything is connected properly.
For mounting, build a bracket using 3/4-inch plywood that holds both your battery pack and the amplifier. This not only keeps your components neat but also minimizes vibrations that can affect sound quality. When placing the subwoofer, try different positions in your enclosure to find the best cavity resonance. For example, setting the subwoofer near a port might enhance the bass response.
Finally, decide whether a ported or sealed enclosure fits your audio goals. A ported design boosts low frequencies by allowing controlled air movement, while a sealed box gives you tighter bass control. Fine-tune your bass by adjusting the port length or using your amplifier's onboard controls until the sound feels balanced.
Battery-Powered Audio Project: Rechargeable System Setup
When building your DIY Bluetooth speaker, the power supply is just as crucial as the sound quality. This project uses a rechargeable circuit that lets you charge the battery via a Micro-USB port. A steady red LED lights up while charging, so you always know the system is getting power. Choosing a Li-ion battery with enough capacity to run the speaker for 4–6 hours at moderate volume is important for continuous playback.
Make sure you secure the battery pack behind the front-panel bracing so it stays in place during use. For a simple, clean setup, wire the Micro-USB input straight to the battery management board. Adding a fuse to the circuit not only guards against over-discharge but also boosts the overall safety of your build. It’s a smart idea to check your solder joints as you work and test the LED indicator to ensure everything is running correctly.
Steps for setting up your rechargeable system:
- Check that your Li-ion battery meets the capacity needed for your desired playtime.
- Connect the Micro-USB port directly to the battery management module.
- Secure the battery pack behind the front-panel bracing.
- Add a fuse and maintain good ventilation around the battery area.
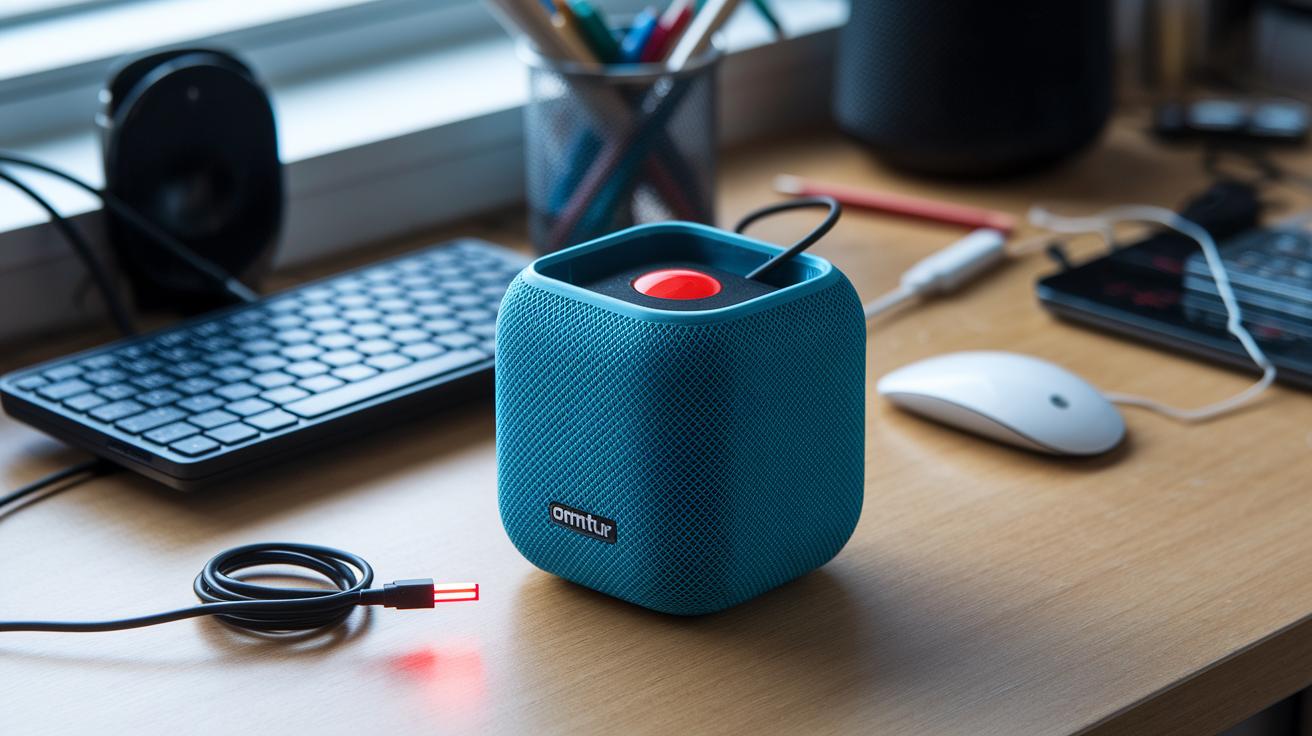
Bluetooth Connectivity Setup and Easy Pairing Instructions
When you power up your DIY Bluetooth speaker kit, you'll quickly hear its startup beeps letting you know it's in pairing mode. Now, grab your smartphone or tablet, open its Bluetooth settings, and look for a device named "DIY Speaker." The speaker’s LED will blink rapidly to signal it's ready to pair, and once the light turns steady, you're all connected.
Follow these easy steps:
- Turn on the speaker and listen for the startup beep.
- Open your device’s Bluetooth settings.
- Tap on “DIY Speaker” when it appears.
- Watch the LED change from blinking to a steady glow, which means pairing was successful.
If you run into any trouble, simply hit the single-button pairing reset on the unit. This reset sends the speaker back into pairing mode so you can try again.
Testing, Troubleshooting, and Sound Quality Optimization
When you power up your DIY Bluetooth speaker kit, start by testing every input, Bluetooth, AUX, and SD. Listen for the startup beeps and watch the red LED on the charging circuit to confirm it acts as expected. A quick audio check tells you that the components are all in order.
Next, check your wiring and solder joints thoroughly. Use a multimeter to test for continuity and make sure there are no cold solder joints or loose connections. If one input doesn't work, revisit its wiring and compare it to the circuit diagram. This step-by-step check helps you spot issues fast.
For subwoofer kits, confirm that the amplifier connections for the subwoofer channel are secure. Make sure that the gain knobs are adjusted to deliver clear, balanced low frequencies. Tweak the amp's gain to avoid distortion while keeping that punchy bass intact.
Finally, brace the front panel to lessen vibration from large speaker cutouts. This minimizes cabinet resonance, giving you clean mids and highs. Run a full test of all inputs and fine-tune your settings until your speaker delivers crisp, balanced sound across every channel.
Customization Ideas: LED Lighting Integration and Aesthetic Finishes
Give your DIY Bluetooth speaker kit a unique twist by adding creative custom features. Wrap addressable RGB LED strips around the speaker cutouts to create a personalized glow. A 5V LED driver connected to the amp's power rail keeps the lights steady, and a microcontroller lets you adjust the patterns, switch colors, or even run a dynamic light show. Picture your LED strip gradually changing hues in time with your music. It's a simple change that makes your project truly one-of-a-kind.
Beyond just the lighting, play with different finishes to perfect your design. Try out various paints or veneers that highlight the natural grain of your wood, or opt for a light stain to maintain a reclaimed look. Adding custom grills, logos, or even leather accents can give your enclosure a distinct personality. Small tweaks like subtle cutouts or textured surfaces make the overall design both practical and visually engaging.
These custom touches not only add style but also transform your kit into a standout project that reflects your personal taste.
Comparing Top DIY Bluetooth Speaker Kits and Supplier Guide

When you're choosing your next DIY Bluetooth speaker kit, focus on factors like cost, connectivity, and sound quality. Our hands-on review shows that the Up2stream Mini V3 is a solid option if you're budget-conscious and need WiFi and Bluetooth streaming without spending a lot. It delivers dependable performance while keeping costs low, making it a smart pick for a cost-effective audio project.
If you need extra flexibility, the Up2stream Pro adds a LAN port and AUX input to expand your connectivity options. This means you can easily mix in more audio sources to suit your setup.
For those chasing superior sound quality, the Up2stream HD DAC stands out. It uses an ESS 9038Q2M chip, which handles hi-res audio up to 192kHz/24-bit, offering crisp clarity and rich details for serious audiophiles. Additionally, the Plate Amp and Plate Amp 2.1 provide good choices for different setups. The Plate Amp 2.1, with its robust 50W channels and a dedicated 100W subwoofer channel, delivers a powerful, deep bass experience, while the standard Plate Amp is excellent for a basic stereo configuration.
Also, check out the community support for each kit. Real-world feedback can make your build process smoother. For dependable parts, stick with reputable online sources and trusted electronic resellers. Always review the specs and user feedback to be sure you're getting the right components for your needs and budget.
Final Words
In the action, we walked through multiple build milestones, from unpacking and component selection to wiring the amplifier and soldering key connections. We broke down enclosure building, subwoofer integration, battery setup, and simple Bluetooth pairing as part of a practical guide. The step-by-step build tutorial helped clarify testing and troubleshooting, while customization ideas provided inspiration. We hope this recap leaves you ready to tackle your diy bluetooth speaker kit with confidence and excitement. Enjoy building and hearing your creation come to life!
FAQ
DIY Bluetooth speaker kit with subwoofer
The DIY Bluetooth speaker kit with subwoofer enhances low-end performance by integrating a dedicated subwoofer channel through an amplifier board, delivering richer bass and an overall balanced audio experience.
Best DIY Bluetooth speaker kit
The best DIY Bluetooth speaker kit combines high-quality components, clear assembly instructions, and versatile connectivity to suit both beginners and audio enthusiasts looking for a reliable, hands-on project.
Bluetooth speaker kit with battery
The Bluetooth speaker kit with battery features a rechargeable Li-ion pack accessed by a Micro-USB port, offering several hours of playtime and ensuring portability for your audio project.
DIY Bluetooth Speaker Kit Amazon
The DIY Bluetooth speaker kit available on Amazon typically includes all necessary components and user-friendly guides, backed by community reviews that help ensure quality and ease of assembly.
DIY Bluetooth speaker kit waterproof
The DIY Bluetooth speaker kit designed to be waterproof uses sealed components and a robust enclosure to protect against moisture, making it a great choice for outdoor or humid environments.
DIY Bluetooth speaker parts
The DIY Bluetooth speaker parts include essential components like a Bluetooth amplifier board, speakers, wiring, and hardware, all provided with clear instructions to assist beginners in building a quality speaker system.
DIY Bluetooth speaker amplifier
The DIY Bluetooth speaker amplifier boosts the audio signal for the speakers and typically offers multiple inputs such as Bluetooth, AUX, and SD card, ensuring versatile connectivity and improved sound quality.