
Have you ever thought that installing a smart doorbell might be tougher than it looks? Setting up a Google Nest Doorbell is actually simpler than many home projects. In this guide, we walk you through every step: turning off the power, labeling your wires, mounting the doorbell, and checking its live feed. We break down the process so that a seemingly complex electrical task becomes a straightforward home upgrade. Give it a try and see how easy it can be.
Quick Step-by-Step Google Nest Doorbell Installation Guide
-
First, cut the power at your home’s circuit breaker and use a test light to check that no voltage is present. Always double-check that the power is off before you touch any wiring.
-
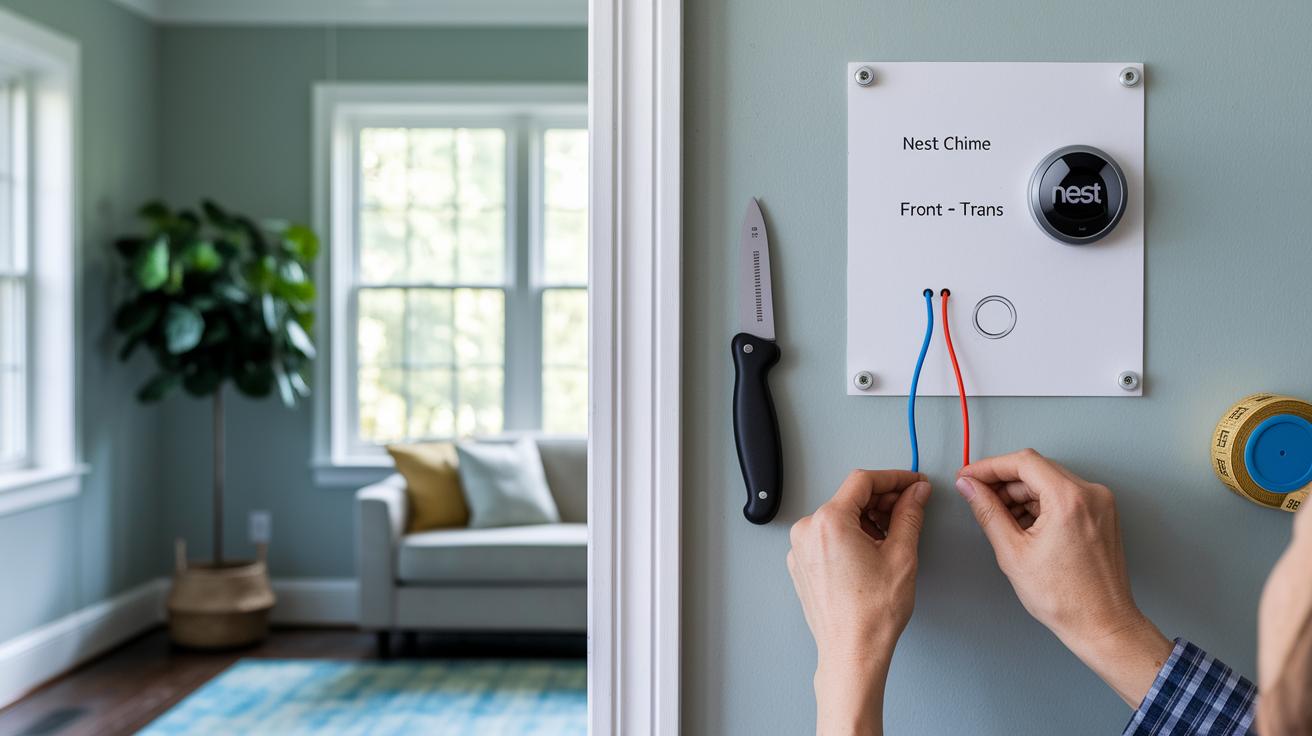
Next, take off your old doorbell. Label the FRONT and TRANS wires as you disconnect them so you can connect them correctly later. This keeps your wiring neat throughout the process.
-
Now, detach the wires from the chime and attach the Nest chime connector according to the provided wiring diagram. Make sure each connection is snug to avoid future issues.
-
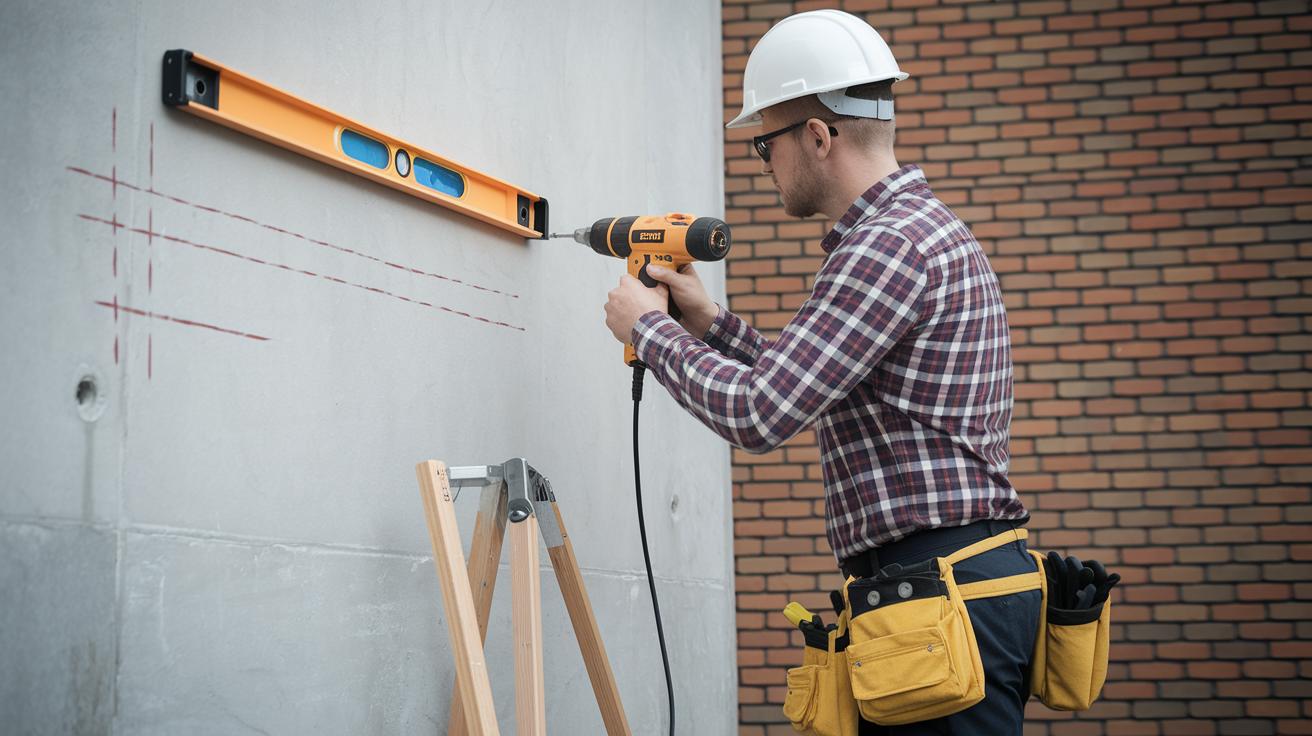
It’s time to mount the new wall plate. Run the labeled wires through the center hole, then gently mark where the screw holes need to go using a pencil. Use the correct anchors for your surface, whether it’s drywall, stucco, or brick, and secure the plate with screws.
-
Open the Google Home or Nest app and scan the QR code on the back of the Nest Doorbell. This step registers the device and sets it up for configuration.
-
Carefully attach the two wires to the screw terminals on the back of the doorbell. Mount the doorbell on the base plate and secure it with the included security screw and hex key to keep it in place.
-
Restore power by turning the breaker back on, and look for a blue light on the doorbell to confirm that it’s receiving power.
-
Finally, reopen the Google Home or Nest app to finish setting up your doorbell. Give it a test ring to ensure the live video feed works and that the chime sounds correctly.
Preparing for Your Google Nest Doorbell Installation
Before you start, gather all the tools you’ll need so you can work smoothly without interruptions. Get a drill with the right bits, a level, and a pencil to mark the spots accurately. Make sure you have both flathead and Phillips screwdrivers, a hammer, wire strippers, and a test light to ensure the power is off.
It’s smart to have a few optional supplies too. For surfaces like stucco, brick, or drywall, consider using anchors and angle mounts for irregular areas. For instance, if you’re drilling into brick, mark the spot with your pencil and check it with your level to get a secure fit.
Don’t forget to download the official installation manual PDF from Google Nest support. Watching the detailed video guide on YouTube can also give you valuable insights. Lastly, create a digital checklist using the Google Home app so you can track every step, from wiring to mounting, and make sure you don’t skip anything important.
Comparing Wired vs Battery Google Nest Doorbell Installation
Wired models use your home's doorbell wiring and a transformer (8 to 24 VAC) to keep the doorbell powered all the time and work with your chime system. For a complete guide on a wired setup, including steps like turning off your circuit, connecting the wires right, mounting the bracket, and checking that everything works, please see the main guide.
Battery Model Installation
- Fully charge the battery before you begin. Think of it like filling up your gas tank before a long drive.
- Open the Google Home app and scan the QR code.
- Install the base plate in your chosen location.
- Snap the doorbell securely into place.
- Follow the in-app directions to finish setting up the device.
- Keep the battery charged regularly to ensure it runs smoothly.
Detailed Wired Google Nest Doorbell Installation Instructions
- Start by turning off the power at your home’s breaker to avoid any risk of shock. Use a test light to make sure there’s no voltage present.
- Remove the existing doorbell and use tape or a marker to label the FRONT and TRANS wires. This helps keep them organized, just like separating ingredients when you cook.
- Check the wiring diagram included in your kit and connect the labeled wires to the Nest chime connector. Take a moment to double-check that every connection is secure.
- Run the wires through the center hole of the metal wall plate. Hold the plate against your wall, mark the screw holes with a pencil, and then use the correct anchors and screws for your surface, whether it’s drywall, brick, or stucco.
- Attach the wires to the screw terminals on the back of the Nest Doorbell. Focus on firmly securing the wires rather than matching colors to reduce any wiring issues.
- Use the provided hex key to tighten the security screw. A tight screw helps keep the doorbell stable, much like securing a bolt before a long bike ride.
- Turn the breaker back on to restore power. A blue light on the doorbell should indicate that it’s receiving power as expected.
- Launch the Google Home app and follow the on-screen prompts to complete the setup.
- Finally, review all the connections to ensure that no wires are left loose.
Google Nest Doorbell Installation: Battery Model Update
For models that run on battery power, please check out our dedicated battery installation guide. It covers things like charging your doorbell and scanning the QR code. This guide here focuses on where to put your doorbell and how to mount it properly.
First, find a spot close to your door, around 3–4 feet high, where you have a good view of your porch. Stand there and test the live Wi-Fi feed, kind of like tuning a radio to find that clear channel.
Next, use a pencil to mark where the base plate holes should go. Then, drill a few small pilot holes and put in the right anchors for your wall type, whether it's stucco, brick, or drywall.
Once you have those anchors, fasten the metal base plate with screws, checking that it’s level. Think of it like hanging a picture, you want it perfect every time.
After the base plate is set, simply click the doorbell into it so that the camera is facing up. (Remember, if you're using a battery model, the pairing process was explained earlier in our guide.)
When you need to take the doorbell down for maintenance, use the release key or a flathead screwdriver to do it safely.
| Installation Type | Key Difference |
|---|---|
| Battery | Use the battery guide for charging and QR pairing steps |
| Wired | Follow extra wiring steps as explained in the wired installation guide |
Pairing and Configuring Google Nest Doorbell in the App

Start by opening the Google Home or Nest app and tap the + icon to add a new device. You can use the QR code on the back of your doorbell, or if you prefer, enter the setup key manually. Once the doorbell shows up in the app, name it “Front door” or pick a custom room name that fits your home layout.
Next, connect your doorbell to Wi-Fi. The app gives you a choice between the 2.4 GHz and 5 GHz bands. Choose the one that works best in your space, and check the doorbell’s green light to be sure the connection is strong.
Once you're connected, take a moment to adjust the camera angle so it captures just the view you need. You can also set motion zones in the app to only get alerts from the important areas. Finally, try out the live video feed and press the doorbell button to confirm that alerts and notifications are working just right.
google nest doorbell installation: Made Easy
If your doorbell fails to power up or the blue light stays off, begin by checking your circuit breaker to confirm that power is off. Then, inspect each wiring connection and verify your transformer is delivering the proper voltage. A quick test light can help you spot any missing voltage.
If you press the doorbell and hear no chime, double-check that the chime connector is installed exactly as the wiring guide shows. A loose connection here could cause missed notifications.
If live streaming is slow or your setup seems delayed because of weak Wi-Fi, try moving your router or adding a Wi-Fi extender. A strong signal is essential for smooth doorbell performance.
If the mounting feels wobbly, it might be because the wrong wall anchors were used for your material, whether it’s stucco, brick, or drywall. Using the right anchors will keep your doorbell firmly in place and prevent vibrations or accidental falls.
When it's time to remove or replace the doorbell, always cut the power first. Then, use the provided release key or a flathead screwdriver to detach it. This method keeps damage to a minimum and makes troubleshooting safer.
Safety Tips and Best Practices for Google Nest Doorbell Installation
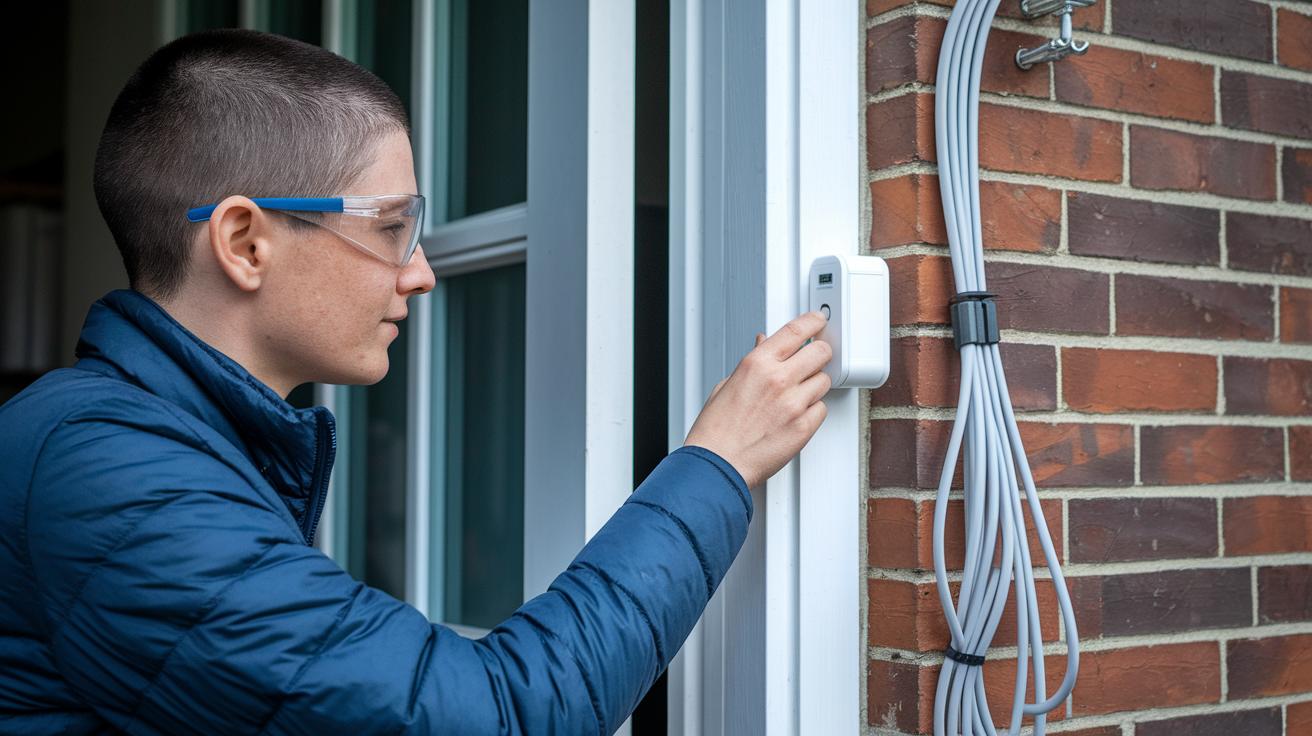
Before you start with any wiring, always switch off the power at the circuit breaker. Double-check with a test light to confirm there's no voltage, think of it like making sure your bike brakes work before a long ride. Remember to wear safety glasses when drilling; it's a small step that keeps your eyes safe from flying debris.
When you're ready to mount the doorbell, apply weatherproof seals along the edges of the wall plate. This simple step helps block water from seeping in and keeps your installation strong over time. Keep your wiring neat by using cable clips to secure loose cords, kind of like organizing the cables behind your TV so they don't end up tangled.
Also, use the provided security screw to discourage theft and make sure your Nest Doorbell stays firmly in place. Taking these precautions not only protects your device but contributes to a clean, professional setup every time. Always prepare your work area thoroughly to enjoy a smooth and safe installation experience.
Maintenance and Battery Replacement Guidelines for Google Nest Doorbell
To keep your Google Nest Doorbell running smoothly, recharge its battery every 2–3 months. If you use it a lot, charging it more often is a smart move. Always use the charging cable that comes with it to avoid any issues. When you need to remove the doorbell for maintenance or battery replacement, turn it off first and then use the release key to take it off safely.
It’s also important to keep your device clean. Wipe the camera lens every few months with a microfiber cloth so your images stay sharp. If you have a wired model, inspect the chime connector once a year and tighten any loose screws. These checks help prevent wiring problems and stop unexpected chime issues.
One more handy tip: save your digital installation checklist in the app. This reminder makes it easy to stick to a regular maintenance routine. Following these steps will help your Google Nest Doorbell perform at its best and last longer.
Final Words
In the action, we outlined a clear setup process, from verifying wiring and safely powering down to mounting, connecting, and app pairing. We compared wired and battery models while sharing safety tips and troubleshooting fixes that let you confidently handle any hiccups. The guide also covered maintenance and battery replacement to keep your system running smoothly. This step-by-step approach to google nest doorbell installation is designed to simplify your setup and boost your confidence while enjoying a smarter, safer home entryway. Enjoy your new peace of mind.
FAQ
What does installing a wired Google Nest Doorbell involve?
Installing a wired Nest Doorbell involves shutting off power at the breaker, disconnecting old wires, connecting them to the Nest chime connector and doorbell, mounting the plate, restoring power, and testing the chime.
How does installing a battery-powered Google Nest Doorbell work?
The battery model installs without hardwiring. You start by fully charging the battery, scan the QR code with the Google Home app, securely mount the base plate, click the doorbell into place, connect to Wi‑Fi, and then test it.
What is the process for a wireless Google Nest Doorbell installation?
A wireless installation mirrors the battery setup. It requires mounting the base plate, scanning the device’s QR code, connecting to Wi‑Fi, and then testing the live video feed—all without traditional wiring.
Where can I find the Google Nest Doorbell installation manual?
The installation manual PDF is available on the official Google Nest support site, and you can also watch an installation video on YouTube for a complete, step-by-step guide.
Do I need an electrician to install my Nest Doorbell?
An electrician isn’t typically required. Homeowners can handle the installation themselves if they are comfortable following wiring instructions and basic safety practices.
Can I install the Google Nest Doorbell myself?
Yes, you can complete the installation on your own by following the clear step-by-step instructions in the Google Home app and manual, ensuring you adhere to safety guidelines throughout the process.
How do I get my Google Doorbell to ring inside my house?
To have your doorbell ring indoors, properly install the Nest chime connector and confirm that your chime wiring is correctly connected according to the manual’s instructions.
Does a Nest Doorbell require wiring?
Wired models require connection to existing doorbell wiring and a transformer, while battery models operate entirely on rechargeable power and are installed without permanent wiring.