
Ever wondered if your ultrabook might still have some room to improve? While many assume these sleek machines can't be upgraded, a few simple tweaks in memory, storage, or the battery can actually boost performance. In this guide, we'll show you how to check your device's upgrade potential and point out which components could use a boost. Even if parts like the CPU are fixed, you can still unlock extra power to help your ultrabook run smoother and last longer.
5 ultrabook upgradeability guide: Boost Performance
Upgrading your ultrabook is a smart way to boost its speed and keep it running longer. First, use a notebook upgrade checklist to examine its design, age, and key specs. Remember that not every ultrabook can be upgraded, many have components like the CPU soldered in, so you might only be able to tweak parts like memory, storage, or the battery.
Start with the memory. Check for available SO-DIMM slots that support DDR4 or LPDDR4X. If you find that the RAM is upgradeable, adding more can improve your multitasking and overall speed. For example, if your ultrabook shows a removable module, swapping it out for a higher-capacity option could help your system run smoother.
Next, dive into storage options. Determine if your device can handle an NVMe or SATA SSD replacement. Upgrading your SSD can shorten boot times and speed up file transfers. Just be sure to back up your data and use cloning tools to transition your operating system seamlessly.
Battery health is another important area. If you notice that your battery no longer holds a charge like it used to, getting an OEM-spec replacement might renew your ultrabook's portability and daily runtime. Keep in mind, however, that many ultrabooks have tight internal layouts and proprietary connectors, so plan your upgrade carefully.
Before you get started, make sure you have the right tools on hand. Gather precision screwdrivers, ESD wrist straps, and plastic pry tools to safely tackle the upgrade process.
| Step | Action |
|---|---|
| 1 | Check your notebook upgrade checklist to confirm which parts can be modified. |
| 2 | Inspect your memory slots for upgrade potential (DDR4/LPDDR4X compatibility). |
| 3 | Review storage options, ensuring support for NVMe or SATA SSDs. |
| 4 | Evaluate battery health and consider an OEM replacement if needed. |
A well-thought-out upgrade plan can make your ultrabook handle multitasking more efficiently, speed up everyday operations, and keep you powered throughout the day. Happy upgrading!
Evaluating Ultrabook Upgrade Potential and Design Constraints

Before you start any upgrades, take a close look at your ultrabook's design. First, check if the processor is permanently attached to the motherboard. If it is, you won't be able to replace it. Older ultrabook models often have replaceable CPUs and extra memory slots, which means you have more options. In simple terms, if you can easily access the RAM and storage connectors, you’re set up for a smoother upgrade.
Next, run through a compatibility check. Look at the specifications and see if the memory slots can handle higher capacity modules and if the storage bay can fit an SSD. Some devices use custom connectors that can block straightforward changes to memory or storage. Understanding these design quirks helps you avoid unnecessary expenses on parts that won’t work.
Finally, consider your device’s age and design limitations. Newer models usually prioritize a slim, modern look, which might keep important parts under sealed panels. If your ultrabook doesn’t allow you to swap out key components like the CPU, focus on easier upgrades such as replacing the battery or boosting storage. Taking an honest look at your ultrabook’s capabilities will help you decide if upgrading your current machine will really boost performance or if it’s better to invest in a new device.
Toolkit Overview and Disassembly Safety Protocols for Ultrabook Mods
Before you start any mod on your ultrabook, make sure you have the right tools to keep everything safe. Gather a set of precision screwdrivers in different sizes, an ESD wrist strap to shield your device from static (it’s like a seatbelt for your internals), plastic pry tools to gently lift parts without scratching them, and soft brushes for removing dust.
Before taking anything apart, check your model’s specific details. Look up the screw types, connector spots, and any torque guidelines for your device. Doing this helps protect your warranty and prevents mistakes like board shorts. Lay out all parts on a clean, static-free surface and keep the screws organized with labels to know exactly where they belong.
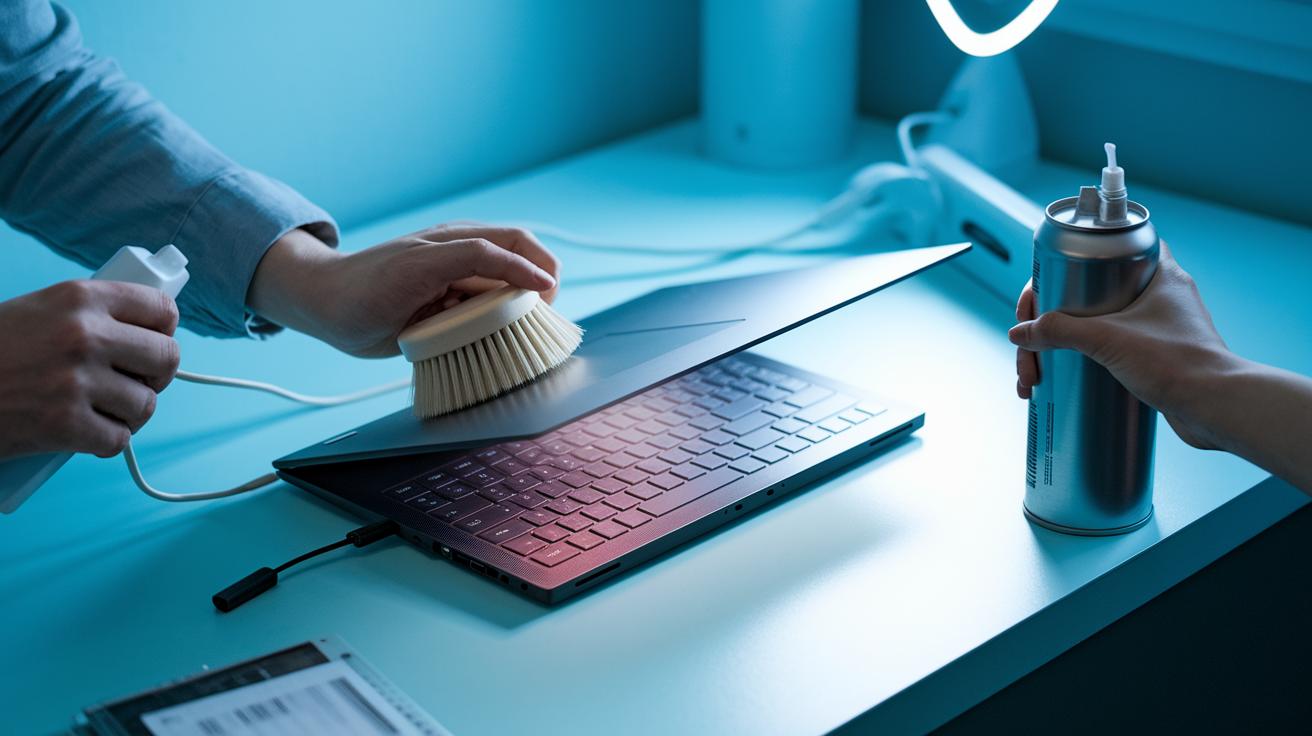
When you see vents and fans during disassembly, take a moment to clean them. Dust can block airflow and lower performance over time. Use a soft brush to carefully remove dust from fans and air channels. This simple step makes the upgrade process safer and prevents accidental static or mechanical mishaps.
Make sure to jot down each step along the way. This record will guide you when it’s time to put everything back together after your modifications.
Memory Expansion Instructions for Ultrabooks

Before you install a new memory module, check your ultrabook's current setup using the BIOS or system settings. Verify whether you've got DDR4 or LPDDR4X memory and note the maximum capacity, if your device supports up to 32 GB, plan your upgrade to match that limit for smooth multitasking.
Follow these straightforward steps:
-
Look at your existing RAM by opening the memory compartment. The SO-DIMM slots are usually behind a small panel on the underside. Snap a quick picture of the layout to make reassembly a breeze.
-
Compare your new modules with the ones already installed. Make sure the new SO-DIMM sticks match the frequency and voltage shown on the specification sheet. Checking the printed part number on the chip is a handy way to ensure compatibility.
-
Shut down your ultrabook and unplug it from the power source. To avoid any risk of static electricity damage, wear an ESD wrist strap. Use a precision screwdriver to remove the screws holding the panel, then carefully lift it off to reveal the memory slots.
-
Insert the new RAM modules at a 45-degree angle, then gently press them down until the latches click into place. Reassemble the panel, secure it with the screws, and power up your device.
-
Finally, verify the upgrade by checking the BIOS or operating system. You should see the total memory reflect the new addition, confirming a successful installation.
SSD Replacement Techniques for Enhanced Storage Capacity
Upgrading your ultrabook with an SSD is one of the easiest ways to speed things up. Most ultrabooks have a single M.2 slot, and some even let you add a second drive using an adapter. Before buying, make sure your ultrabook fits the right size. Check if it supports M.2 2242 or M.2 2280 drives because using the wrong size can cause problems when installing.
Backup your files first using a cloning tool. Cloning copies your operating system and files to the new SSD, so you won't lose any important data. You might see a message like "System backup complete – ready to clone," which tells you your settings are safe and the process is smoother.
Then, remove the old drive by opening the access panel. Use a precision screwdriver to remove the screws, and carefully slide out the current drive. If you’re switching from an HDD to an NVMe or SATA SSD, notice the type of connector and cable setup. In some cases, this swap can cut your boot time from minutes to seconds and boost file transfers by up to 5 times.
Once the new SSD is in the slot, secure it with the provided screws. Put the panel back, turn on your ultrabook, and check the BIOS to ensure the drive is detected. A quick performance test in your operating system should show much faster boot and data access speeds, proving your upgrade worked well.
Battery Replacement Procedure to Restore Ultrabook Portability

Over time, your ultrabook's battery might fall below 70% health, which can cut down your runtime. Replacing the battery with one that meets the original OEM specifications is key to getting back that full performance. For instance, if the battery label reads "4-cell, 10.8V, OEM," that's the exact match you need.
Before you begin, make sure your ultrabook is off, unplugged, and has cooled down. Follow these steps for a safe battery swap:
- Turn off your ultrabook and disconnect it from any power source.
- Remove the back panel to reveal the battery pack.
- Use a plastic pry tool to gently lift the battery that is held in place with adhesive. This step helps protect other parts inside.
- Detach any connected cables so the battery is completely free.
- Clean off any leftover adhesive to get a smooth surface for the new battery.
After taking out the old battery, slot in your new OEM battery and reconnect the cables snugly as they were originally arranged. Once done, fit the back panel back and secure all screws firmly.
Finally, recalibrate your battery by charging it fully, then letting it discharge completely before charging it again. This resets the battery's charging cycle, helping the power management system work accurately and restoring performance.
BIOS Update Method and Firmware Upgrade Guidelines
Keeping your BIOS and firmware updated is key to getting the best performance from your ultrabook. Start by visiting your OEM website to check for the newest firmware version. Most update programs will walk you through the process and display messages like "Firmware version is up to date" or "A new version is available" so you know exactly what to do next.
Before updating your BIOS, make sure your ultrabook is running on its battery and is connected to its charger. A steady power supply is essential, as even a short interruption can lead to errors. If you run into issues like POST errors after swapping hardware, a CMOS reset might be your solution. To perform a CMOS reset, shut down the device, disconnect the battery, hold the power button for about 10 seconds, then reconnect the battery and turn the device back on.
Also, be sure to back up any important data before starting the update. Following these guidelines helps maintain system stability and ensures that any new hardware works nicely with your ultrabook. Regular firmware checks can also boost stability and extend your device's life.
System Cooling Optimization and Thermal Management Techniques
Keeping your ultrabook cool is essential for top performance. Dust can build up in the vents and raise CPU temperatures by 10 to 15 °C. To avoid this, make sure you clean the fans and air channels with compressed air and a soft brush. This simple step can really help when your device is working hard.
Renewing the thermal paste on the CPU and GPU improves heat transfer and can add about a 5 to 10% boost in thermal headroom. When you replace the old paste, choose a higher-grade product to keep the temperatures lower and your system running efficiently. In many cases, combining a careful cleaning of the fans with fresh thermal paste leads to a noticeable improvement in system responsiveness.
It’s also a good idea to check whether your ultrabook supports fan or heat-pipe upgrades. Even if space is tight, adjusting the fan curve from the BIOS can help improve cooling. Running a quick diagnostic test can reveal any weak spots in your cooling setup.
Maintenance checklist:
- Clean vents and fans regularly.
- Apply a new layer of thermal paste.
- Evaluate fan performance and adjust BIOS settings.
- Check for available upgrades on cooling modules.
Following these cooling tips can keep your ultrabook running smoothly during demanding tasks and help extend its lifespan.
DIY vs Professional Ultrabook Upgrades: Risks, Warranty, and Cost-Benefit Analysis
If you're thinking about giving your ultrabook a performance boost, you have two choices. You can dive into a DIY upgrade to save on labor and tailor every component for your needs, or you can rely on a professional service that takes care of everything for you. Tackling the upgrade on your own might be rewarding, but remember it carries risks, if you open it up or accidentally damage something, your warranty could be cancelled.
On the other hand, a professional upgrade offers peace of mind. Experts double-check that each new piece fits perfectly and works safely with your device. Yes, this option adds to the cost, but it cuts down on the chance of mistakes that could lead to even more expenses later. Keep in mind that a full upgrade can cost between 30% and 50% of the price of a new midrange ultrabook. In some cases, spending that money on a brand new device might be the smarter move, especially if several parts need replacing.
Here's the bottom line:
- DIY upgrades help you save on labor costs but may risk voiding your warranty.
- Professional upgrades ensure that parts are compatible and keep your warranty intact, though they come with additional service fees.
- It's important to compare component costs and labor so you can decide whether upgrading or buying new makes better financial sense.
Final Words
In the action, this ultrabook upgradeability guide broke down each step, from checking design limits and gathering essential tools to upgrading memory, storage, battery, and cooling systems.
We offered practical tips for careful disassembly while weighing DIY efforts versus professional help.
The guide provided clear steps and realistic advice to boost performance and extend your device’s life.
Keep pushing forward and enjoy getting the best value out of your ultrabook!
FAQ
Can I upgrade my laptop processor from an i3 or i5 to an i7?
Upgrading the laptop CPU depends on its design. Many laptops have processors soldered to the motherboard, so check your device’s specifications to see if a swap is possible.
How can I upgrade or increase my laptop’s RAM, whether through a physical upgrade or free methods on Windows 10/11?
Upgrading or increasing your laptop’s RAM involves installing additional memory if supported. Adjusting virtual memory settings on Windows can help, but physical upgrades remain the most effective improvement.
Are ultrabooks easily upgradeable and how can I check my laptop’s upgradability?
Evaluating upgrade potential in ultrabooks means reviewing manufacturer guides and internal design, as many have limited options. Checking for socketed parts and consulting the manual helps assess genuine upgrade possibilities.
Can I upgrade a 10-year-old laptop or is a 7-year-old laptop too old for upgrades?
Older laptops may support basic component upgrades, though hardware limitations exist. A 10-year-old laptop might allow improvements if components are modular, while a 7-year-old system can still benefit, depending on its design.